Composite Log Editor
The Composite Log Editor (1D Model > Log Composition > Composite Log Editor) serves as both a place to review your composite logs and their inputs and as a means of editing the composite logs. Information for the composite logs is reviewed on an individual basis; the composite log of interest is specified in the form and a list of its input logs is displayed in a table layout. In the table, you can manually specify which segments of the input log are to be used in the composite and generate a new composite log based on your specifications.
To edit a composite log
- Select the composite log of interest in the drop-down list. The table below populates with each of the input logs that was originally used during log composition, ordered by depth. In other words, the log making up the most shallow segment appears first in the list, the log used for the second most shallow segment appears second in the list, and so on.
- Editing is performed in the Start MD and Stop MD columns. In these columns, specify the desired segments for each of the input logs. You can also insert new segments into the table as described below.
- To insert a new segment, right-click one of the segments in the table and select Insert segment above or Insert segment below, depending on how you want to edit the log. After inserting the new segment, click into the drop-down list in the Name column and select the input log you want to use for that segment. Finally, specify the segment in the Start MD and Stop MD columns.
- Click Apply to affect the segment changes. If you also have the Compositor view open for the log that is being updated, you will see the results of your changes immediately.
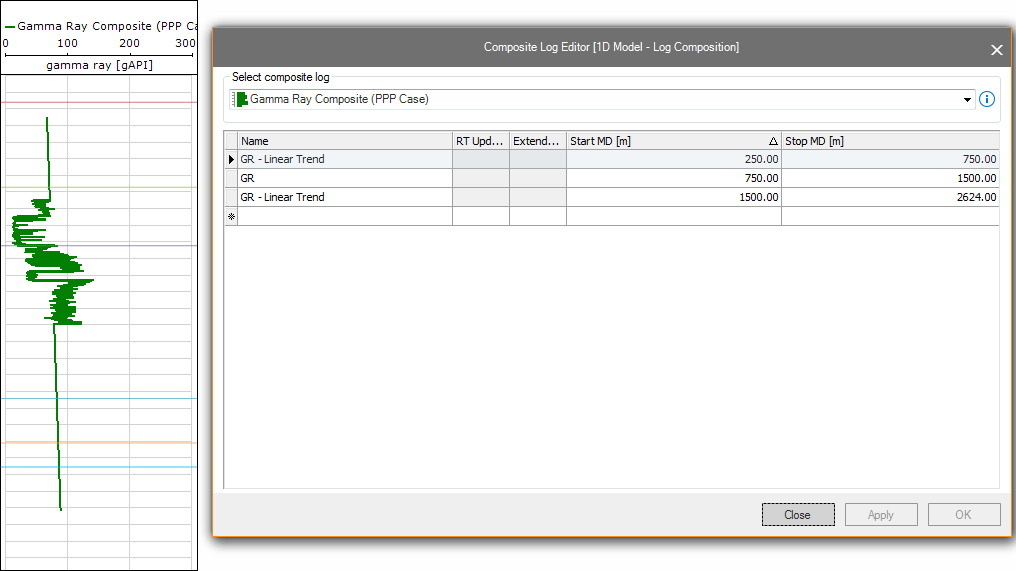
Viewing real-time update status information
For each input log that is connected to real-time updates on a WITSML server you can review the most recent polling time in the RT Update column. The Extendable column indicates whether or not the input log has an active connection to a WITSML server. Green indicates an active connection, red indicates no connection.
Segment overlap
Overlapping segments are not accepted and the application will attempt to fix any overlap it encounters. When you attempt to apply changes that cause overlap to occur, a prompt appears and you can specify how you want the overlap to be corrected. There are two options:
- Automatic adjustment (OK) The application corrects the overlapping segments when OK is clicked. When automatic adjustments occur, the deeper of the two segments is adjusted to eliminate the overlap, irrespective of which segment has actually been edited. For example, if Segment A spans from 50m to 100m and Segment B from 100m to 150m, and Segment B is adjusted to span from 90m to 150m, which would cause an overlap into Segment A, Segment B will be adjusted to span from 100m to 150m.
- Manual adjustment (Cancel) Selecting Cancel allows you to return to the form and eliminate the overlap manually.